In our first lesson today we explored various different typographies that we liked around the university and on Pinterest. Here are some of the examples of various different typefaces I liked around the university campus:
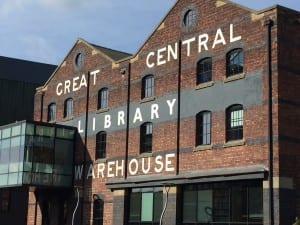 The sans-serif font here works well with explaining what the building is. I also like when type is on buildings as it adds history too.
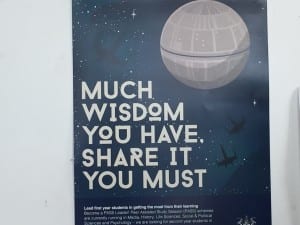 I love the font used here. It is quite unusual but works well with the image of the moon behind it. It is fun and easy to read and is also pleasing to look at, drawing your eyes to the poster.
 I found this on the wall in the AAD building. I love how it appears to have been written with some sort of inky pen and I like the handwriting style too. I specifically chose this word as the flick on the J is attractive and drew my eyes in.
Here are some of the typographies that I liked on Pinterest:

I love the variety of fonts and thicknesses of the fonts on this poster. I also like the more retro styles and the fact they stuck to only using one colour for the type and one colour for the background. The poster is fun and explains everything you need to know without it being boring to read.
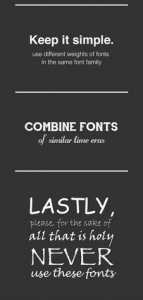
This is part of a picture I found on Pinterest that informs you on what does and does not work with type. I like how the points they make are further backed up by them giving examples with their typefaces and I like the comical element in it too. I think this Pin will be of more use than most as it gives me advice on what works.


